使用 WebAssembly 進行擴充功能開發 - 第二部分
2024 年 6 月 7 日,Dirk Bäumer 撰寫
在前一篇關於使用 WebAssembly 進行擴充功能開發 的部落格文章中,我們示範了如何使用元件模型將 WebAssembly 程式碼整合到您的 Visual Studio Code 擴充功能中。在這篇部落格文章中,我們將重點放在另外兩個獨立的使用案例:(a) 在 Worker 中執行 WebAssembly 程式碼,以避免封鎖擴充功能主機的主要執行緒,以及 (b) 使用編譯為 WebAssembly 的語言建立 語言伺服器。
若要執行這篇部落格文章中的範例,您需要下列工具:VS Code、Node.js、Rust 編譯器工具鏈、wasm-tools 和 wit-bindgen。
在 Worker 中執行 WebAssembly 程式碼
在前一篇部落格文章中的範例是在 VS Code 擴充功能主機的主要執行緒中執行 WebAssembly 程式碼。只要執行時間短,這就沒問題。但是,長時間執行的作業應該在 Worker 中執行,以確保擴充功能主機的主要執行緒保持可用於其他擴充功能。
VS Code 元件模型提供了一個中繼模型,透過讓我們自動產生 Worker 端和擴充功能主端上必要的膠合程式碼,讓這件事變得更容易。
下列程式碼片段顯示 Worker 的必要程式碼。此範例假設程式碼儲存在名為 worker.ts 的檔案中
import { Connection, RAL } from '@vscode/wasm-component-model';
import { calculator } from './calculator';

async function main(): Promise<void> {
  const connection = await Connection.createWorker(calculator._);
  connection.listen();
}

main().catch(RAL().console.error);
此程式碼會建立連線以與擴充功能主機 Worker 通訊,並使用 wit2ts 工具產生的 calculator 世界初始化連線。
在擴充功能端,我們也會載入 WebAssembly 模組並將其繫結至 calculator 世界。執行計算的對應呼叫需要等待,因為執行會在 Worker 中非同步發生 (例如,await api.calc(...))。
// The channel for printing the result.
const channel = vscode.window.createOutputChannel('Calculator');
context.subscriptions.push(channel);

// The channel for printing the log.
const log = vscode.window.createOutputChannel('Calculator - Log', { log: true });
context.subscriptions.push(log);

// The implementation of the log function that is called from WASM
const service: calculator.Imports.Promisified = {
  log: async (msg: string): Promise<void> => {
    // Wait 100ms to slow things down :-)
    await new Promise(resolve => setTimeout(resolve, 100));
    log.info(msg);
  }
};

// Load the WASM model
const filename = vscode.Uri.joinPath(
  context.extensionUri,
  'target',
  'wasm32-unknown-unknown',
  'debug',
  'calculator.wasm'
);
const bits = await vscode.workspace.fs.readFile(filename);
const module = await WebAssembly.compile(bits);

// Create the worker
const worker = new Worker(
  vscode.Uri.joinPath(context.extensionUri, './out/worker.js').fsPath
);
// Bind the world to the worker
const api = await calculator._.bind(service, module, worker);

vscode.commands.registerCommand(
  'vscode-samples.wasm-component-model-async.run',
  async () => {
    channel.show();
    channel.appendLine('Running calculator example');
    const add = Types.Operation.Add({ left: 1, right: 2 });
    channel.appendLine(`Add ${await api.calc(add)}`);
    const sub = Types.Operation.Sub({ left: 10, right: 8 });
    channel.appendLine(`Sub ${await api.calc(sub)}`);
    const mul = Types.Operation.Mul({ left: 3, right: 7 });
    channel.appendLine(`Mul ${await api.calc(mul)}`);
    const div = Types.Operation.Div({ left: 10, right: 2 });
    channel.appendLine(`Div ${await api.calc(div)}`);
  }
);
有幾件事需要注意
- 此範例中使用的 WIT 檔案與前一篇部落格文章中 計算機範例 中使用的 WIT 檔案沒有不同。
- 由於 WebAssembly 程式碼的執行發生在 Worker 中,因此匯入服務的實作 (例如,上述的
log函式) 可以傳回Promise,但並非必要。 - WebAssembly 目前僅支援同步執行模型。因此,從 Worker 執行 WebAssembly 程式碼到擴充功能主機以呼叫匯入服務的每個呼叫都需要下列步驟
- 將訊息發佈到擴充功能主機主要執行緒,描述要呼叫的服務 (例如,呼叫
log函式)。 - 使用
Atomics.wait暫停 Worker 執行。 - 在擴充功能主機主要執行緒中處理訊息。
- 恢復 Worker 並使用
Atomics.notify通知它有關結果。
- 將訊息發佈到擴充功能主機主要執行緒,描述要呼叫的服務 (例如,呼叫
此同步會增加可測量的時間額外負擔。雖然所有這些步驟都由元件模型透明地處理,但開發人員應該意識到這些步驟,並在設計匯入的 API 介面時考慮到這一點。
您可以在 VS Code 擴充功能範例存放庫 中找到此範例的完整原始碼。
基於 WebAssembly 的語言伺服器
當我們開始研究 適用於 Web 版 VS Code 的 WebAssembly 支援 時,我們設想的使用案例之一是使用 WebAssembly 執行語言伺服器。隨著 VS Code 的 LSP 程式庫 的最新變更以及橋接 WebAssembly 和 LSP 的新模組的引入,實作 WebAssembly 語言伺服器現在就像將其實作為作業系統程序一樣簡單。
此外,WebAssembly 語言伺服器在 WebAssembly Core 擴充功能 上執行,該擴充功能完全支援 WASI Preview 1。這表示語言伺服器可以使用其程式設計語言的常規檔案系統 API 存取工作區中的檔案,即使檔案是遠端儲存的,例如在 GitHub 存放庫中。
下列程式碼片段顯示了基於 lsp_server crate 的 範例伺服器 的 Rust 語言伺服器。此語言伺服器不執行任何語言分析,但僅針對 GotoDefinition 要求傳回預定義的結果
match cast::<GotoDefinition>(req) {
    Ok((id, params)) => {
        let uri = params.text_document_position_params.text_document.uri;
        eprintln!("Received gotoDefinition request #{} {}", id, uri.to_string());
        let loc = Location::new(
            uri,
            lsp_types::Range::new(lsp_types::Position::new(0, 0), lsp_types::Position::new(0, 0))
        );
        let mut vec = Vec::new();
        vec.push(loc);
        let result = Some(GotoDefinitionResponse::Array(vec));
        let result = serde_json::to_value(&result).unwrap();
        let resp = Response { id, result: Some(result), error: None };
        connection.sender.send(Message::Response(resp))?;
        continue;
    }
    Err(err @ ExtractError::JsonError { .. }) => panic!("{err:?}"),
    Err(ExtractError::MethodMismatch(req)) => req,
};
您可以在 VS Code 範例存放庫 中找到語言伺服器的完整原始碼。
您可以使用新的 @vscode/wasm-wasi-lsp npm 模組在擴充功能的 TypeScript 程式碼中建立 WebAssembly 語言伺服器。使用 WebAssembly Core 擴充功能 將 WebAssembly 程式碼例項化為具有 WASI 支援的 Worker,這在我們的 在 Web 版 VS Code 中執行 WebAssembly 部落格文章中有詳細描述。
擴充功能的 TypeScript 程式碼也很簡單。它為純文字檔案註冊伺服器。
import {
  createStdioOptions,
  createUriConverters,
  startServer
} from '@vscode/wasm-wasi-lsp';

export async function activate(context: ExtensionContext) {
  const wasm: Wasm = await Wasm.load();

  const channel = window.createOutputChannel('LSP WASM Server');
  // The server options to run the WebAssembly language server.
  const serverOptions: ServerOptions = async () => {
    const options: ProcessOptions = {
      stdio: createStdioOptions(),
      mountPoints: [{ kind: 'workspaceFolder' }]
    };

    // Load the WebAssembly code
    const filename = Uri.joinPath(
      context.extensionUri,
      'server',
      'target',
      'wasm32-wasip1-threads',
      'release',
      'server.wasm'
    );
    const bits = await workspace.fs.readFile(filename);
    const module = await WebAssembly.compile(bits);

    // Create the wasm worker that runs the LSP server
    const process = await wasm.createProcess(
      'lsp-server',
      module,
      { initial: 160, maximum: 160, shared: true },
      options
    );

    // Hook stderr to the output channel
    const decoder = new TextDecoder('utf-8');
    process.stderr!.onData(data => {
      channel.append(decoder.decode(data));
    });

    return startServer(process);
  };

  const clientOptions: LanguageClientOptions = {
    documentSelector: [{ language: 'plaintext' }],
    outputChannel: channel,
    uriConverters: createUriConverters()
  };

  let client = new LanguageClient('lspClient', 'LSP Client', serverOptions, clientOptions);
  await client.start();
}
執行程式碼會在純文字檔案的內容選單中新增一個「跳到定義」項目。執行此動作會將對應的要求傳送至 LSP 伺服器。
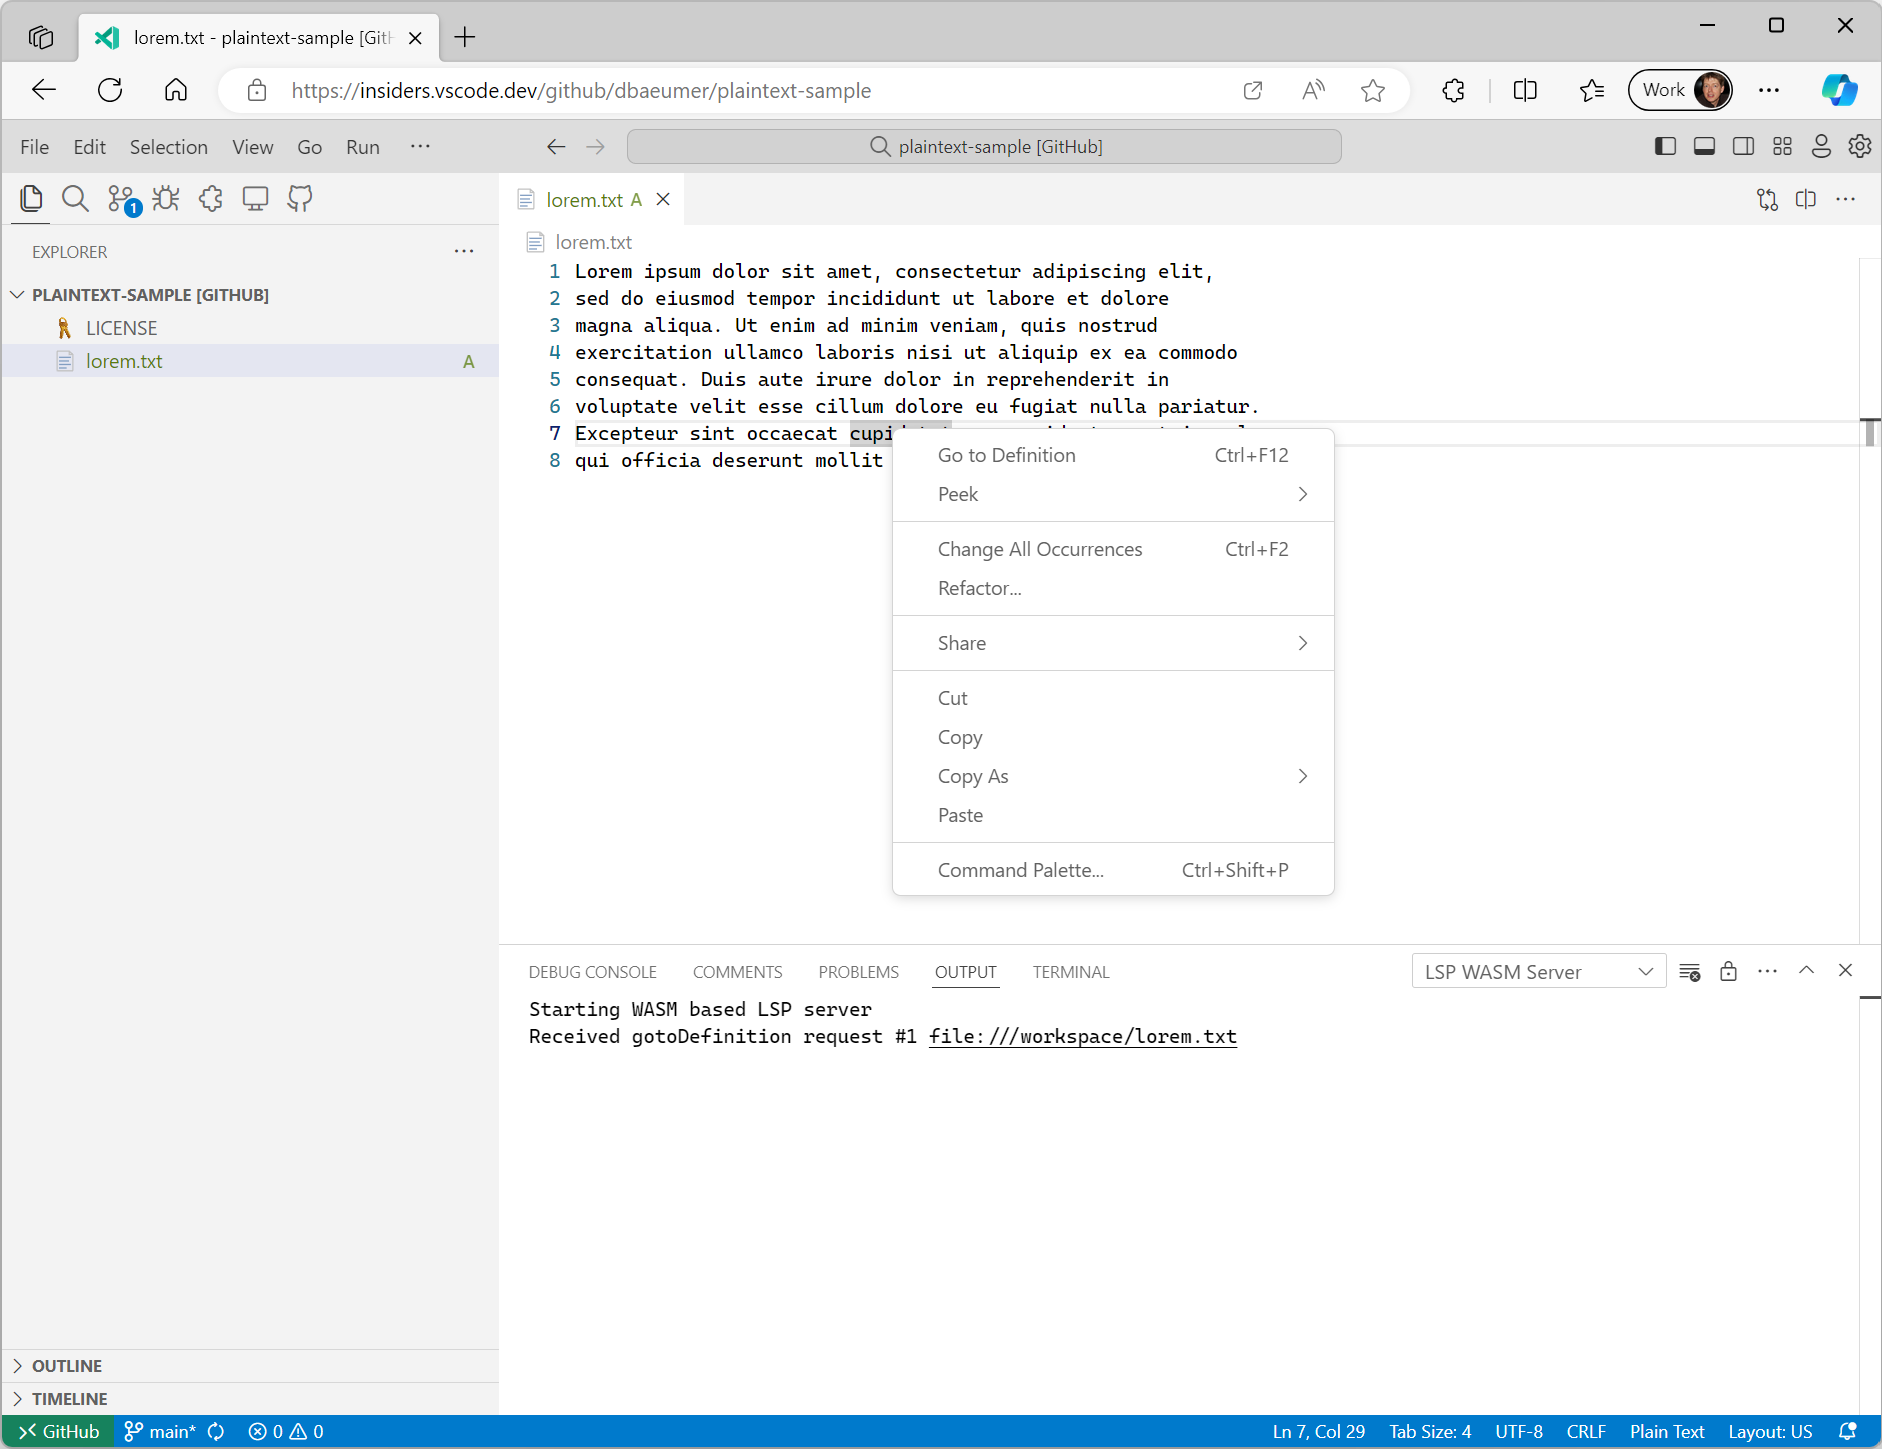
請務必注意,@vscode/wasm-wasi-lsp npm 模組會自動將文件 URI 從其工作區值轉換為 WASI Preview 1 主機中可辨識的值。在上面的範例中,VS Code 內的文字文件 URI 通常類似於 vscode-vfs://github/dbaeumer/plaintext-sample/lorem.txt,並且此值會轉換為 file:///workspace/lorem.txt,這在 WASI 主機內可辨識。當語言伺服器將 URI 送回 VS Code 時,也會自動發生此轉換。
大多數語言伺服器程式庫都支援自訂訊息,可以輕鬆地將語言伺服器中尚未存在於 語言伺服器協定規格 中的功能新增至語言伺服器。下列程式碼片段顯示了如何為計算給定工作區資料夾中檔案數量的自訂訊息處理常式新增到我們先前使用的 Rust 語言伺服器
#[derive(Debug, Eq, PartialEq, Clone, Deserialize, Serialize)]
#[serde(rename_all = "camelCase")]
pub struct CountFilesParams {
pub folder: Url,
}
pub enum CountFilesRequest {}
impl Request for CountFilesRequest {
type Params = CountFilesParams;
type Result = u32;
const METHOD: &'static str = "wasm-language-server/countFilesInDirectory";
}
//...
for msg in &connection.receiver {
match msg {
//....
match cast::<CountFilesRequest>(req) {
Ok((id, params)) => {
eprintln!("Received countFiles request #{} {}", id, params.folder);
let result = count_files_in_directory(¶ms.folder.path());
let json = serde_json::to_value(&result).unwrap();
let resp = Response { id, result: Some(json), error: None };
connection.sender.send(Message::Response(resp))?;
continue;
}
Err(err @ ExtractError::JsonError { .. }) => panic!("{err:?}"),
Err(ExtractError::MethodMismatch(req)) => req,
}
}
//...
}
fn count_files_in_directory(path: &str) -> usize {
WalkDir::new(path)
.into_iter()
.filter_map(Result::ok)
.filter(|entry| entry.file_type().is_file())
.count()
}
用於將此自訂要求傳送至 LSP 伺服器的 TypeScript 程式碼如下所示
const folder = workspace.workspaceFolders![0].uri;
const result = await client.sendRequest(CountFilesRequest, {
folder: client.code2ProtocolConverter.asUri(folder)
});
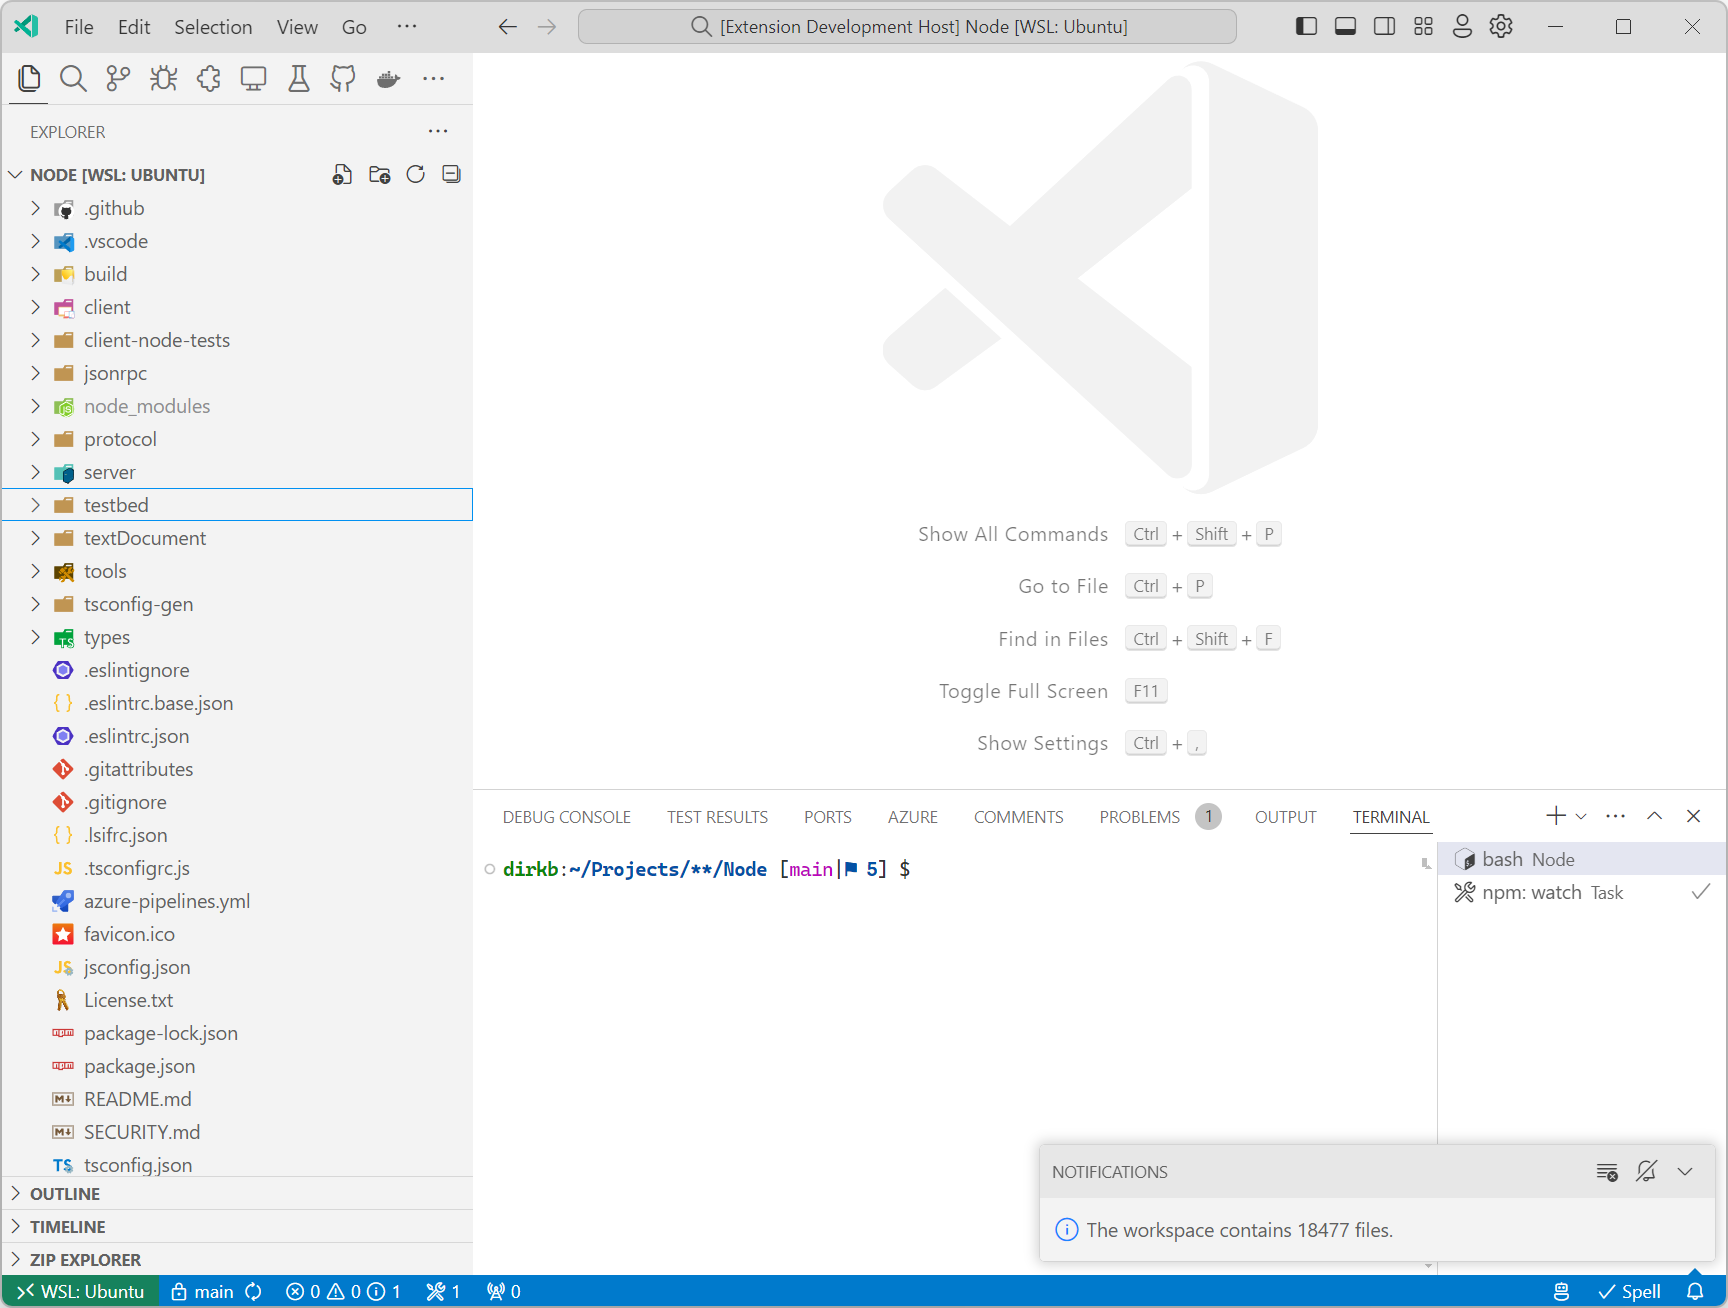
window.showInformationMessage(`The workspace contains ${result} files.`);
在 vscode-languageserver 存放庫上執行此程式碼會顯示下列通知
請注意,語言伺服器不一定需要實作 語言伺服器協定 規格中指定的任何功能。如果擴充功能想要整合只能編譯為 WASI Preview 1 目標的程式庫程式碼,則在 VS Code 的元件模型實作中支援 WASI 0.2 預覽之前,實作具有自訂訊息的語言伺服器可能是一個不錯的選擇。
接下來的發展
如同前一篇部落格文章中提到的,我們將繼續努力為 VS Code 實作 WASI 0.2 預覽。我們也計劃擴展程式碼範例,以包含 Rust 以外的其他編譯為 WASM 的語言。
感謝您,
Dirk 和 VS Code 團隊
快樂編碼!