開始使用 VS Code 中的 GitHub Copilot
Visual Studio Code 具有由 GitHub 驅動的豐富 AI 功能。在本教學課程中,您將探索如何在編輯器中編碼時使用 AI、詢問有關程式碼的問題,以及開始編輯工作階段以跨多個檔案進行變更。
雖然本教學課程使用 JavaScript 和 TypeScript,但請注意,Copilot 也接受過許多其他語言和各種框架的訓練。
必要條件
-
在您的電腦上安裝 VS Code。從 Visual Studio Code 網站下載。
-
存取 GitHub Copilot。依照這些步驟在 VS Code 中設定 GitHub Copilot。
提示如果您沒有 Copilot 訂閱或組織已指派席位給您,您可以直接從 VS Code 內註冊免費使用 Copilot,並獲得每月完成次數和聊天互動的限制。
取得您的第一個程式碼建議
若要開始使用 VS Code 中的 AI 功能,您不必執行任何特殊操作。當您在編輯器中輸入程式碼時,Copilot 會自動在編輯器中向您顯示程式碼建議 (程式碼完成),以協助您更有效率地編碼。
-
開啟 VS Code 並建立新的 JavaScript 檔案
calculator.js。 -
在 JavaScript 檔案中,開始輸入以下程式碼
class Calculator請注意,當您輸入時,您會自動取得灰色暗淡文字 (幽靈文字) 中
Calculator類別實作的程式碼建議。您收到的確切建議可能會有所不同,因為大型語言模型是非決定性的。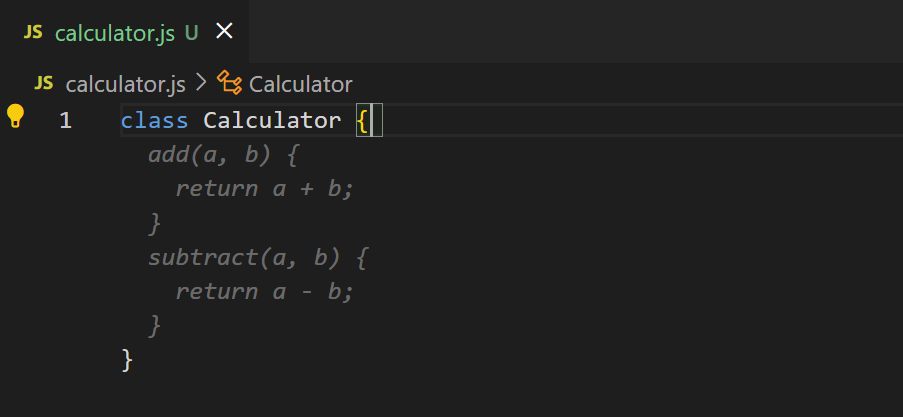
-
若要接受建議,請按下 Tab 鍵。
恭喜!您剛剛接受了您的第一個 AI 驅動的程式碼建議。當您繼續輸入時,Copilot 會相應地更新程式碼建議。
-
對於任何給定的輸入,可能有多個建議。在類別內輸入以下程式碼以新增
factorial方法factorial(n) { -
將滑鼠游標停留在編輯器中的建議上方,並注意有多個建議。
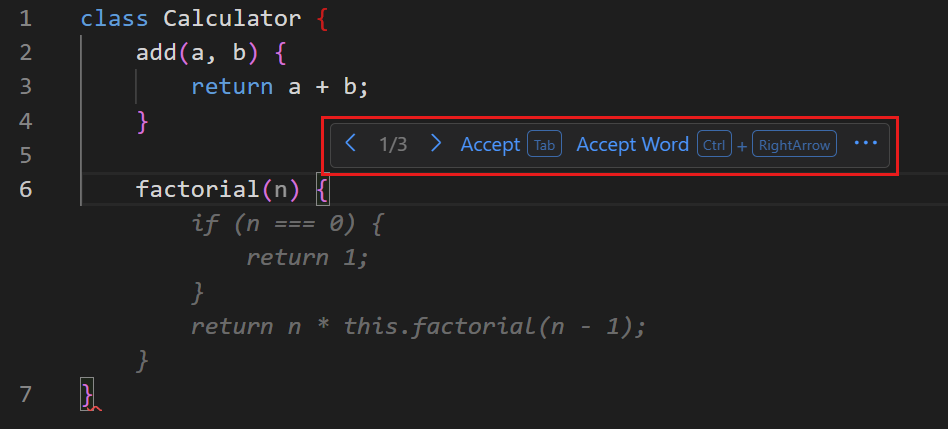
您可以使用箭頭控制項或使用鍵盤快速鍵來顯示下一個 (⌥] (Windows、Linux Alt+])) 或上一個 (⌥[ (Windows、Linux Alt+[)) 建議。
AI 驅動的程式碼完成功能可以協助您產生樣板程式碼或重複程式碼,讓您保持在開發人員流程中,並專注於更複雜的編碼工作。
使用編輯器行內聊天功能產生基本網頁伺服器
透過以聊天為基礎的 AI,您可以使用自然語言詢問有關程式碼的問題,或要求它為您產生程式碼。編輯器行內聊天功能直接在編輯器中提供聊天介面,因此您可以提示有關使用中編輯器中的程式碼。
讓我們使用編輯器行內聊天功能來協助產生基本的 Express 網頁伺服器。
-
首先,將新的 TypeScript 檔案
server.ts新增至您的工作區。 -
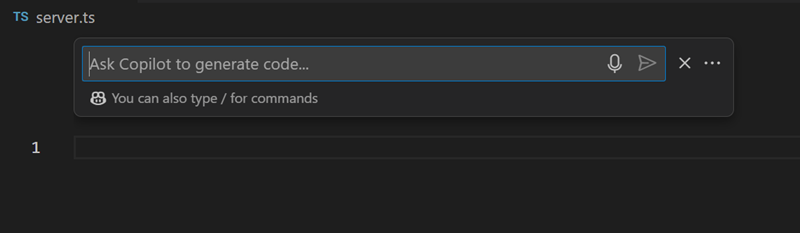
現在,按下鍵盤上的 ⌘I (Windows、Linux Ctrl+I) 以開啟編輯器行內聊天功能。
編輯器行內聊天功能為您提供聊天介面,可讓您詢問有關使用中編輯器中程式碼的問題,或為您產生程式碼。
-
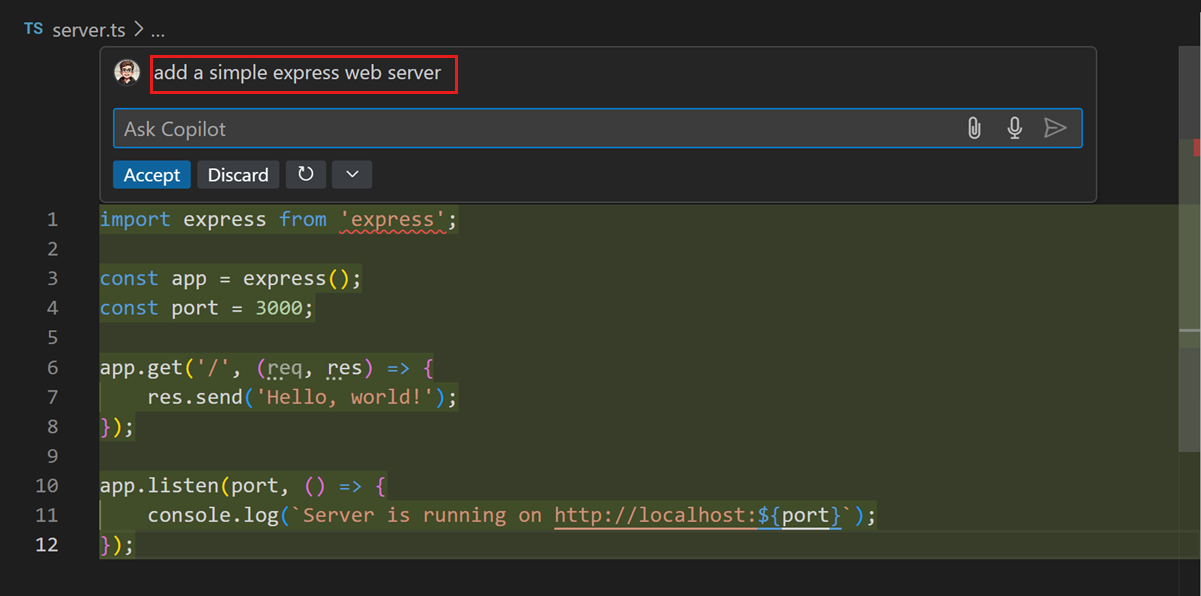
在聊天輸入欄位中輸入「add a simple express web server」,然後按下 Enter 以提交提示。
請注意,程式碼變更開始直接在編輯器中串流。回應是簡單 Node.js Express 網頁伺服器的實作。
-
選取 [接受] 或按下 ⌘Enter (Windows、Linux Ctrl+Enter) 以套用建議的程式碼變更。
恭喜!您已使用編輯器行內聊天功能,透過聊天和自然語言產生程式碼。
透過 AI 聊天功能重構您的程式碼
您也可以使用編輯器行內聊天功能來重構或改善編輯器中現有的程式碼。
請注意,產生的網頁伺服器目前使用靜態連接埠號碼 3000。讓我們將其變更為改用環境變數。
-
在編輯器中,選取
server.ts檔案中的3000連接埠號碼,然後按下 ⌘I (Windows、Linux Ctrl+I) 以開啟行內聊天功能。 -
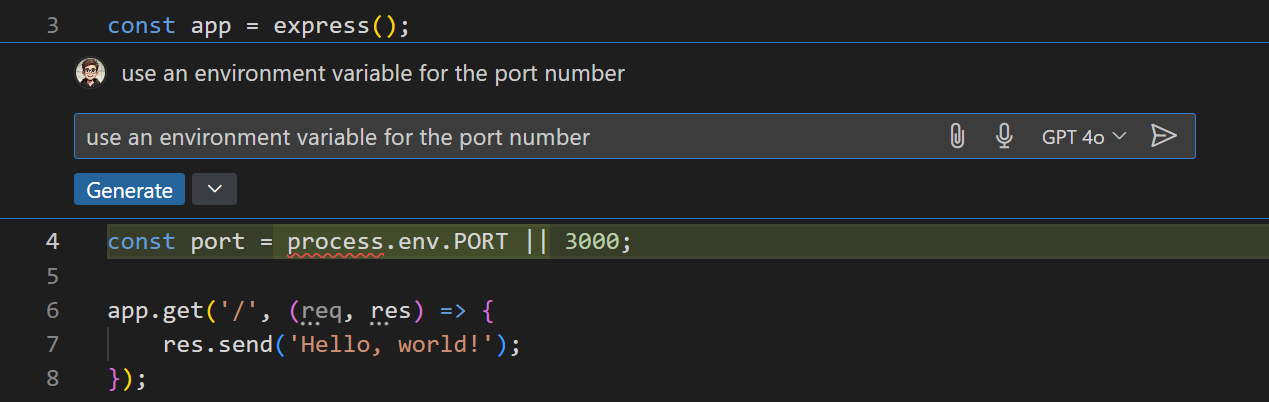
在聊天輸入欄位中輸入「use an environment variable for the port number」,然後按下 Enter 以傳送聊天要求或提示。
請注意,現有程式碼已更新為使用環境變數作為連接埠號碼。
-
選取 [接受] 或按下 ⌘Enter (Windows、Linux Ctrl+Enter) 以套用建議的程式碼變更。
-
如果您對建議的變更不滿意,您可以修改提示並繼續反覆運算以獲得不同的解決方案。例如,要求使用不同的環境變數名稱作為連接埠號碼。
使用聊天功能提出一般程式設計問題
當您在新的程式碼庫中工作,或探索新的程式設計語言時,您可能會遇到更一般的編碼問題。透過使用聊天功能,您可以在側邊進行聊天對話,這會追蹤您的問題記錄。
-
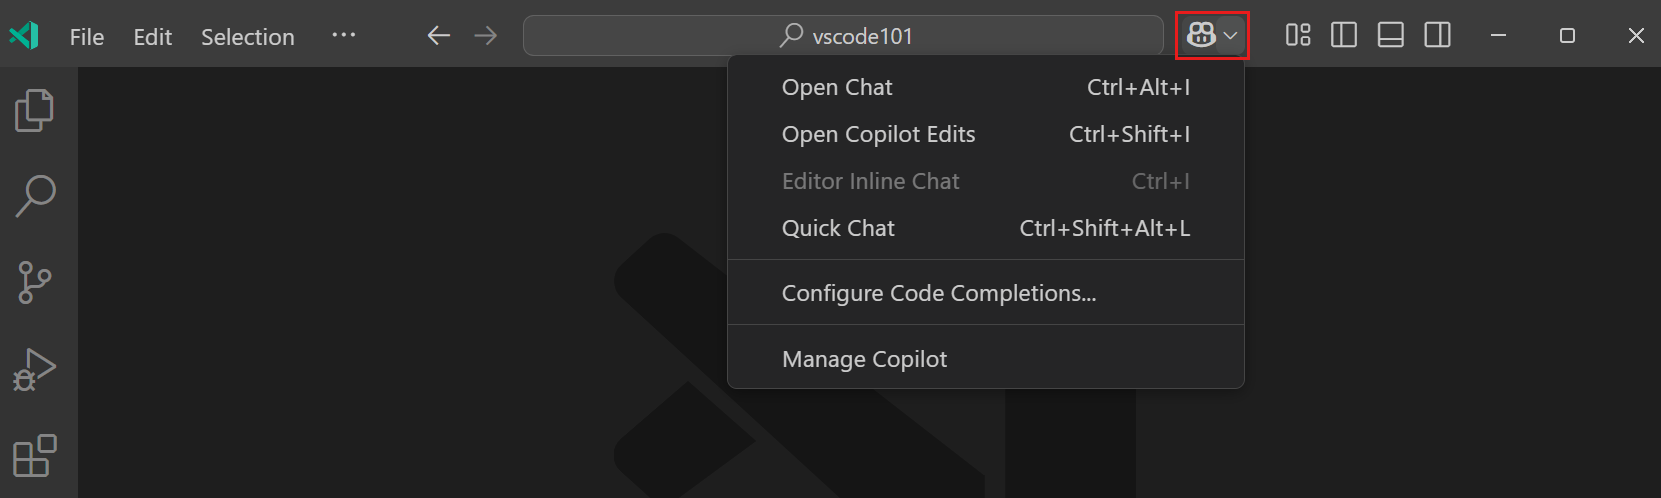
從標題列中的 Copilot 功能表開啟 [聊天] 檢視,或按下 ⌃⌘I (Windows、Linux Ctrl+Alt+I)。
-
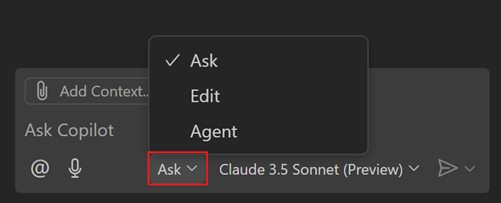
您可以使用不同的方式使用聊天功能。從模式下拉式選單中選取 [詢問] 以提出問題。
在後續步驟中,您將使用聊天功能開始編輯工作階段,並跨多個檔案進行變更。
 提示
提示您可以從下拉式選單中選擇不同的模型,以變更聊天功能中使用的語言模型。
-
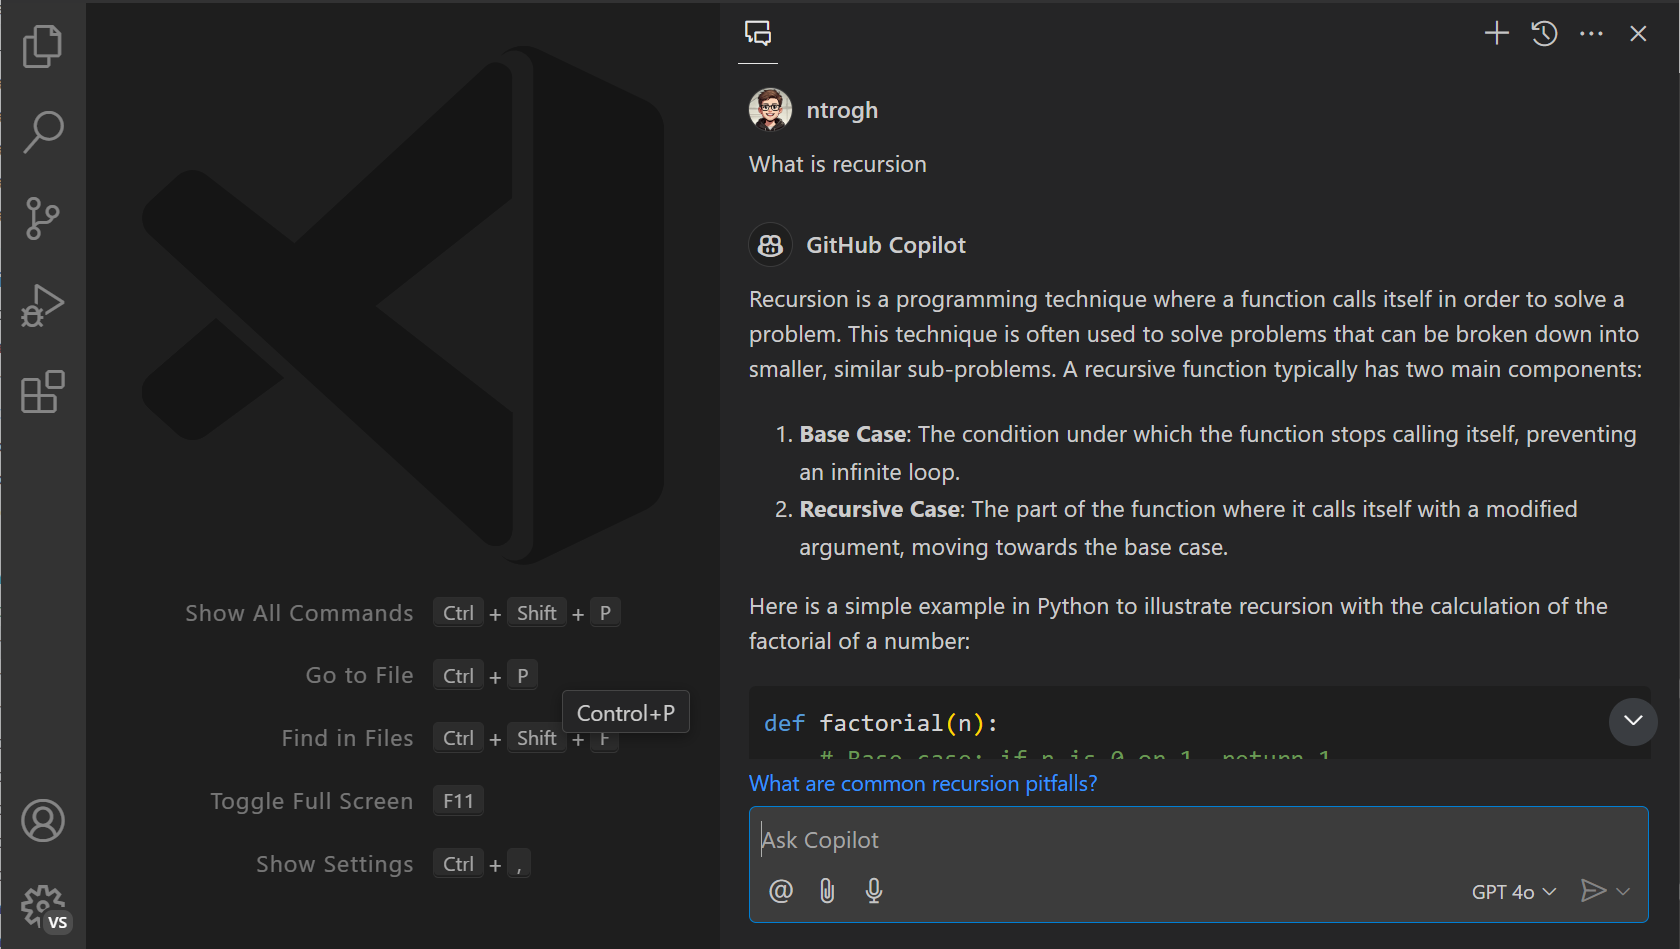
在聊天輸入欄位中輸入「what is recursion?」,然後按下 Enter 以提交您的聊天提示。
請注意,聊天回應如何包含豐富的結果,例如 Markdown 文字和程式碼區塊。
-
依照 聊天教學課程 中的步驟,了解您也可以如何使用聊天功能詢問有關特定程式碼庫的問題。
跨多個檔案進行編輯
對於可能涉及編輯多個檔案的較大程式碼變更,您可以啟動 AI 驅動的編輯工作階段。編輯不會在 [聊天] 檢視中接收程式碼區塊,而是直接套用至您工作區中各個檔案。
讓我們開始編輯工作階段,以傳回我們網頁伺服器的 HTML 檔案內容。
-
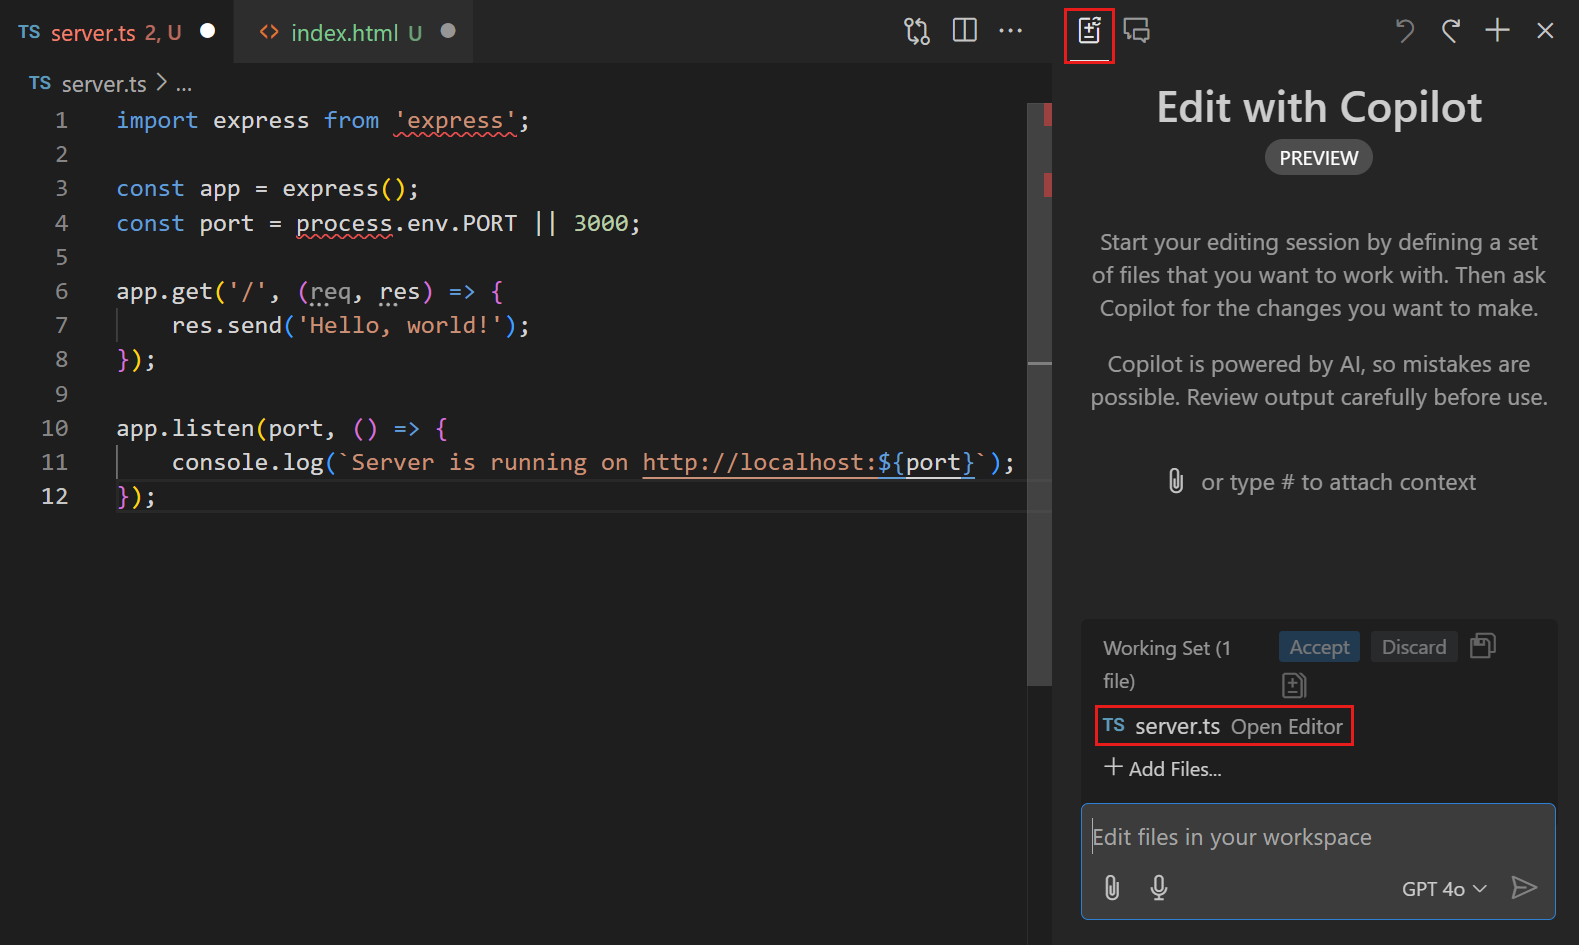
從 [聊天] 檢視中的模式下拉式選單中選取 [編輯]。

-
請注意,
server.ts檔案會自動新增為您聊天提示的情境。透過將檔案新增為提示的情境,AI 模型可以提供更相關的程式碼編輯。您可以選擇使用 [新增情境] 按鈕,將更多情境新增至提示。
-
在聊天輸入欄位中輸入 Return a static html page as the home page and implement it.,然後按下 Enter 以開始新的編輯工作階段。
請注意,多個編輯已套用至您的專案:
server.ts檔案現在會傳回新建立的index.htmlHTML 頁面。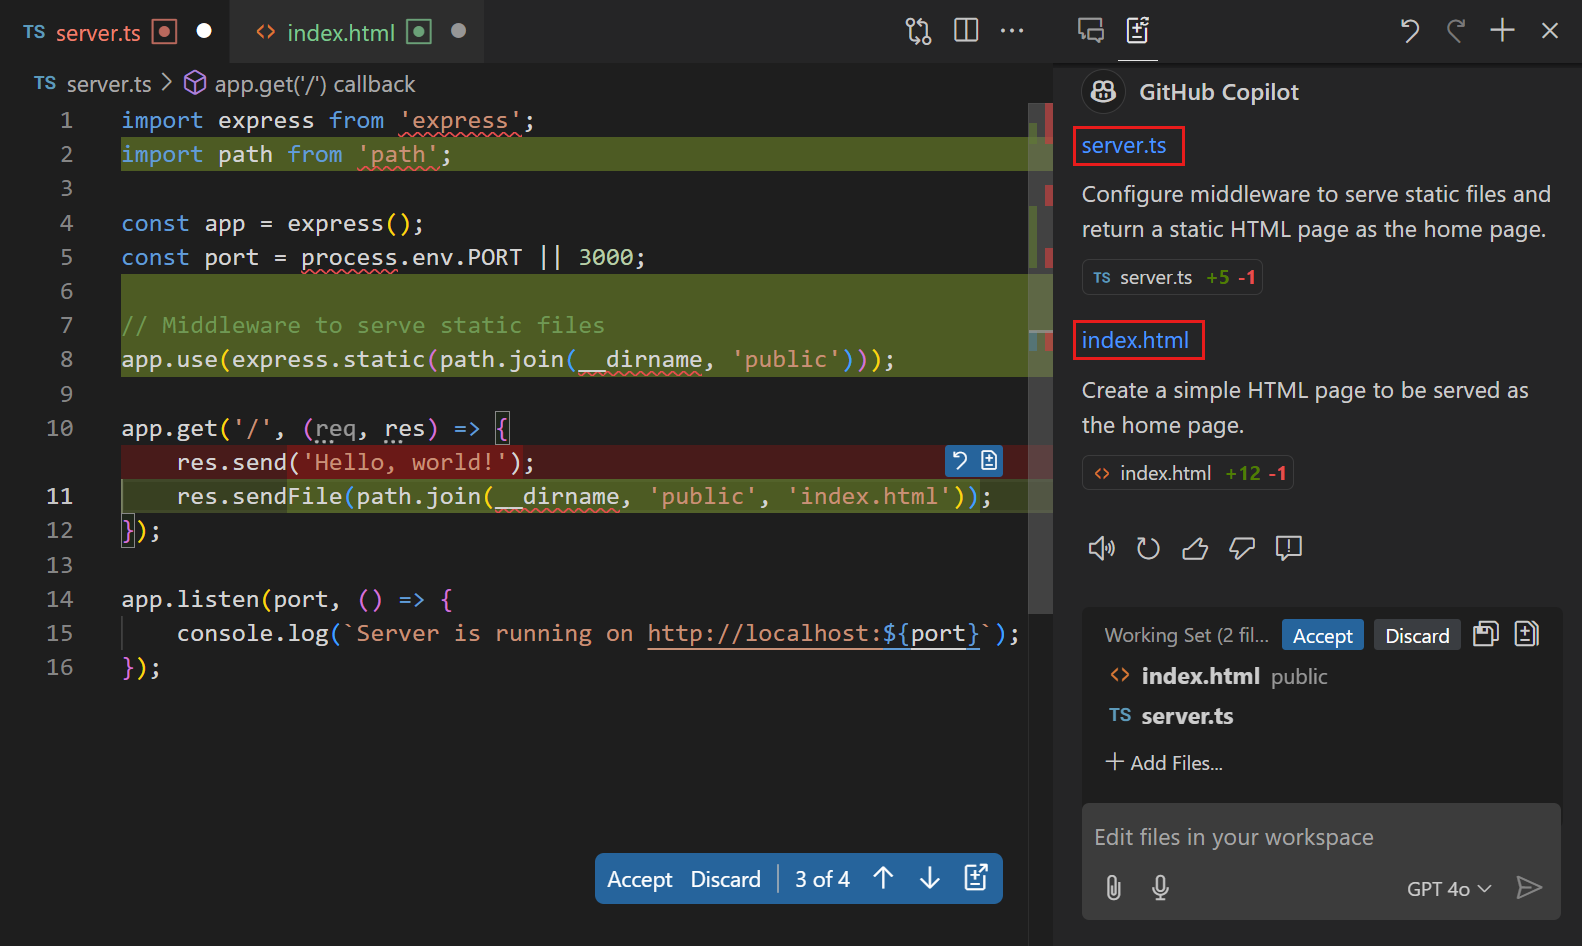
-
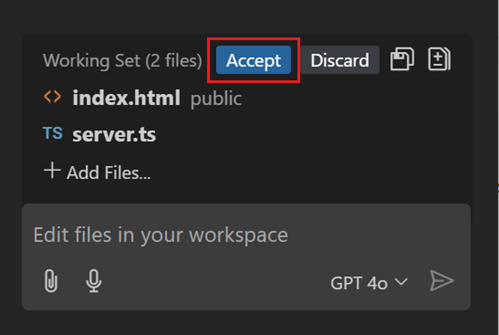
如果您對結果感到滿意,請選取 [保留] 以套用所有建議的變更。
您也可以使用編輯器覆疊控制項,在不同的已編輯檔案之間導覽,並接受或拒絕它們。
使用 AI 修正程式碼錯誤
除了行內建議和聊天對話之外,AI 功能在 VS Code 中開發人員流程的不同區域也可用。您可能會透過 VS Code 使用者介面中的閃爍圖示注意到 AI 功能的存在。
其中一個地方是編輯器,只要有編譯器錯誤造成的紅色波浪線。讓我們使用 AI 來修正編碼錯誤。
-
開啟您稍早在編輯器中建立的
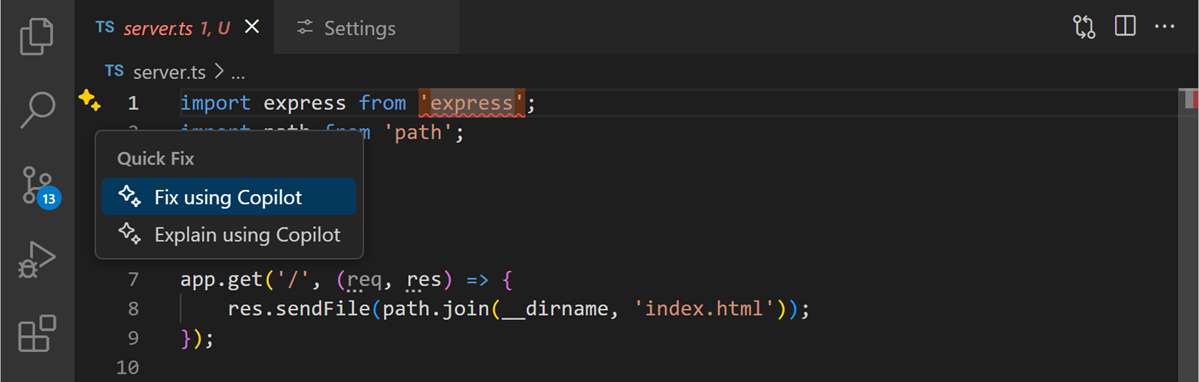
server.tsTypeScript 檔案。請注意,
import express from 'express';陳述式包含紅色波浪線。如果您將游標放在紅色波浪線上,您可以看到閃爍圖示出現。
-
選取閃爍圖示以檢視 [AI 程式碼動作],然後選取 [使用 Copilot 修正]。
-
請注意,編輯器行內聊天功能隨即出現,預先填入錯誤訊息和修正問題的解決方案。

您可以選擇直接從聊天回應中選取 [插入到終端機] 按鈕,以將建議的命令複製到您的終端機中。
後續步驟
恭喜,您現在已使用 AI 來增強您的編碼!在本教學課程中,您已成功使用 VS Code 中的 AI 功能,以在編輯器中取得程式碼完成功能,並使用聊天功能來提出問題和產生程式碼編輯。
-
若要深入了解聊天功能,請繼續前往 Copilot 聊天教學課程。
-
若要深入了解 AI 程式碼編輯,請繼續前往 Copilot Edits 文件。
相關資源
- 查看我們在 YouTube 上關於 Copilot 最佳做法 和 進階功能 的影片。